While we all stay indoors and search for better things to entertain ourselves, we look through various resources online to find that one thing fascinating enough, yet easy enough to make with our kids.
We have brought you another fun DIY Rope activity to enjoy your time at home.
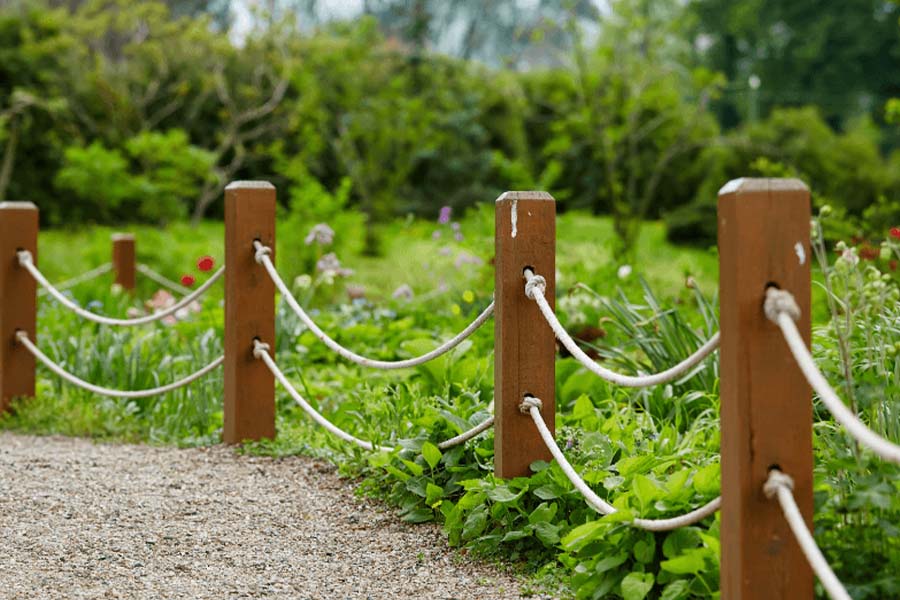
Garden Rope Fences are popular in countryside and in city-houses which have lawns connected to them. These Garden Rope Fences can also be found in some parks. They look trendy and are useful for the climbers in your garden. Once the climbers have tied themselves around these fences, they would look even more beautiful. What’s more, they are absolutely easy to build.
Here is the perfect Garden Rope Fence DIY for you to make it in 3 simple steps —
Step #1 — Determine the length of the rope required
Before visiting a market (online or offline), you will need to determine exactly what length of the rope you have to buy. Rather than walking into a store and being unsure about the required length, or spending too much to buy a huge bulk of rope, it is better to measure first. For this, you will need to decide the place in your garden where you want to tie the fence. Try visualising the length, breadth and height and measure using a measuring tape. When in doubt, always consider the larger length.
Step #2 — Purchasing the materials required for building the Garden Rope Fence
The things that you will need are — Ropes, wooden stakes, metal hooks, Oil Paint and a garden hole digger or a spade. How many of which you will need depends on your desired placement and pattern of the rope fence that you want to build. Buy from a nearby store, or order online, whichever is more convenient and cheaper option for you.
Step #3 — Preparing the Land and materials
The preparing part involves digging holes in your lawn. Make sure you create parallel holes both horizontally and vertically, or you might end up with an annoying asymmetrical fence. Next thing, you can paint the fence wood stakes in colours and designs that you like. This is the part where you can involve your kids and let them get creative. You will also need to cut the ropes in required amounts.
Step #4 — Adding the rope posts
Now that the holes are dug, you just have to put the wooden stakes inside them. Make sure the paint is dried. While digging the holes, you have to be careful not to dig it too wide, or you will end up with large holes and loose fences that are good for nothing. While installing the posts make sure you put all the posts on the same height so as to maintain the symmetry. Once done, secure it with soil firmly in place.
Step #5 — Attaching the Ropes
This is the final step for building a DIY Garden Rope Fence. All you need to do is to attack the ropes to the rope posts. For this, you can use metal hooks and rope fittings. However, if you want to avoid this extra splurge, you can just tie a knot over thin Rope posts. But this is not going to look very tidy if your posts aren’t thin enough, while the metal hooks will give your fences an amazing professional finish. Once done, pull the ropes from all sides and shake all the posts, but very gently to make sure that your fence is sturdy enough.
And that’s it, you’re done!
It looks pretty easy, doesn’t it?
Rope fences are popular in houses with lawns and gardens. You can use them for your front porches or your backyards. If not for a boundary fencing, you can just put this fence in your yards to demarcate separate area for your plants, for your pets, or even for play area or around your pool area. Even if you don’t put in the extra efforts of painting the rope posts, the classic wooden texture would also look classy and do well when it comes to beautifying the external appearance of your house.
This rope fence might just level up the appearance of your yards and lawns without burning a hole in your pocket.

